Author: Rick (Page 16 of 17)

Final Exam Update

I turned in my final today, but with one picture being discarded in favor of another. The photo of the General Sam Houston statue silhouette had to be discarded. The reason for this was the print that was made showed a problem with the negative. When making a print, I was getting what looked like black dust to the left of the statue. This didn’t show up in the scan (more than likely due to the software that helps remove dust from the pictures). When I examined the negative on the light table I found some specks on the left side and the top of the negative. I asked my teacher about it and, after looking closely at the emulsion side of the negative, determined that a substance was on the negative and was causing the bad prints. I tried to clean the negative, but it was a no go. This really sucks because I loved the picture.

The picture I decided to go with is the medium format globe picture below. It still fits the theme and I am confident the teacher will see the same thing.

As always, comments are welcome.

Why am I Not in Bed?

No matter what, usually when I get new pictures I just can’t wait to get them “developed”. Whether it’s digital or on film, new pictures do get me excited. The birth of new creation is always fun. I guess that’s why I can’t wait. As it is, though, it’s 1:30 am here.

Tonight my wife and I did a little Christmas shopping. Well, she did a little Christmas shopping. I bought a couple of CD’s and decided to take some pictures of the Christmas decorations in The Galleria with my DSLR. We were going to take some pictures earlier today of the southern end of Montrose Boulevard in Houston, but like a dumbass I forgot my tripod and grabbed the wrong lens. I grabbed my super wide angle instead of my medium zoom. It’s ok, though… we went down to South Montrose anyway and visited The Menil Collection Museum to see some contemporary art. Perhaps next weekend we will go to the Houston Center for Photography Center (reminds me of the American Dodgeball Association of America from “Dodgeball”).

Anyway, I got some good pictures with the DSLR. My biggest concern with them, however, is the amount of color fixing I had to do with them. When I use the “Standard” style setting, the pictures have a reddish tint to them. Today I tried the “Neutral” setting. The reddish tint was gone, but the colors were a little more washed out. I had to do a lot of saturation level tweaking (on individual primary colors) to get it right. I guess I need to experiment a little more (perhaps white balance?).

At any rate, here are a few of the pictures I took earlier this evening:


The Galleria places a very large tree in the center of the ice-skating rink every Christmas. I don’t know it’s real or fake. I just wish the decorations were a little more colorful.


These last three are a few of the rather large ornaments that flank the tree. These are suspended from the ceiling of Galleria I, where the ice skating rink is located.

I know that when it comes to photography the person behind the viewfinder counts more than the piece of glass on the front of the body. However, a good lens helps the picture that much more. I took my super wide on this outing, which was not my intention. The super wide has an aperture range of f/2.8 – 4. My medium zoom has a fixed aperture of f/2.8. The variable aperture on the super wide didn’t help my depth-of-field. On several pictures I got a depth-of-field much deeper than desired due to the fact the maximum aperture closed due to zooming.

I have to go back tomorrow (or is it tonight?) to pick up 2007’s special ornament. I think this time I’m going to take the medium zoom along with my 50mm f/1.8 lens. Hopefully I can get some better depth-of-field.

As always, I need comments. The comments help me grow as a photographer.

I Should be in Bed…

… But I’m not. I tried to take a few pictures of the Thanksgiving feast, but all I got was a picture of the turkey and a very poor one at that. I did get a decent picture of green beans in a colander after being washed, but that’s the only decent food picture I got. The centerpiece, most expertly created by my wife, did come out good.

So the other night I got a wild hair and decided to shoot some night pictures from my front door. I got one picture that came out presentable. I took these pics at around 3 am. The shot is of 2 trees in front of my neighbor’s home. I’m not sure why, but I exposed for the highlights but the sky kept coming out lighter than it actually was. I live in Houston so the sky is never black, but this made it look almost like dusk. All in all, however, I am learning lots about available light exposure.

As always, feedback is welcome and encouraged.

Crunch Time

First of all, I just want to say that I hope everyone who celebrates Thanksgiving had a good holiday. For those of you who don’t celebrate Thanksgiving, I still hope you had a good day :).

At this point we are getting down to crunch time on the semester. I’ve been going through my scans and I’ve decided on the 12 photos that I’m going to submit for the final exam. The requirements for the final are as follows:

12 high-quality prints, spot toned where necessary,
contact sheets for the rolls of film from which the print was made,
each print is to be matted on 11×14 mat board,
a self-critique, and,
all prints should have an overall theme.

The theme I decided to go with is the design and architecture of structures in Houston. It could be a park bench, a pool, or a skyscraper. The unifying theme here is that the main elements in the photo are designed and built by men and women to help make the city beautiful. Without further ado, here are the photos I will be submitting for the final. The photos are in order from oldest to newest… I think I can see a progression here :).


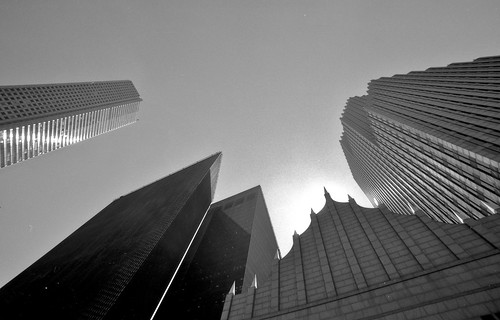
Houston Icons 1 – From left: JPMorgan Chase Tower, Penzoil Plaza, and Bank of America Tower


The water wall at Williams Tower – this thing pumps 11,000 gallons of water per hour. It is truly a sight to behold close up.


Williams Tower – At 901 feet this is the third tallest building in Houston (22nd in US) but probably one of the first recognizable skyscrapers in the city.


A Houston Metro bus stop in the Uptown/Galleria area of Houston. This interesting design is only found on the bus stops in this area of town.


Houston Icons 2 – From left: Continental Airlines corporate headquarters, the old Enron corporate headquarters, and a building that I am currently unable to identify.


The Ring – This skyway is a complete circle around the intersection of Smith St. and Bell St. in downtown Houston. The attached building here is the old Enron building.


General Sam Houston sculpture in Miller Park, just south of downtown Houston.


A shot looking north from the side of the reflecting pool in Miller Park.


Halliburton Center(?) just outside Minute Maid Park. Halliburton Center is part of the Minute Maid Park grounds and is located on the Crawford St. side of the stadium. These are the unusual benches that are in this little park.


I forget the name of this Roman Catholic Church, but it is one of the few left in Houston that hasn’t been torn down in favor of a more modern design. This church is located just across Texas Ave from Minute Maid Park.


Another angle of the old Roman Catholic Church. This church was built in 1839.


Bank of America Tower as seen from the veranda of Jones Hall.

Here is my final exam. Let me know what you think as your comments help me grow.

Still Going

It’s coming to that time of year when the semester is winding down. I have to start seriously thinking about my portfolio for my final exam. I have an idea in mind, but at this point I’m going through my scans and looking at photos on a virtual light table to see how things look together. Hopefully I’ll have a concrete idea next week and can start printing and matting in earnest. Wish me luck on that.

Aside from that, I shot another roll of 220 and a roll of 35mm. I think I’m becoming more discriminating as with these 2 rolls, I didn’t find many that were up to my own standards. This definitely isn’t a bad thing. I also am finding myself considering more factors when looking at photographs. That’s a good thing, too, but I need to be careful about becoming a snob, especially when I myself am at a low level within the art.

At any rate, here some off the new rolls I thought to share with you. Let me know what you think as the comments help me grow.


This is my college in my first fairly successful night shot. I’m going to have to ask my professor about the flare from the light on the left hand side. I’m sure it’s not lens flare, but it does take away from the overall picture.


Another silhouette of this plant. I have another one showing on my Flickr account. This plant actually makes for some good lens testing. This shot as well as the night shot were both taken on my Canon Rebel Ti 35mm SLR.


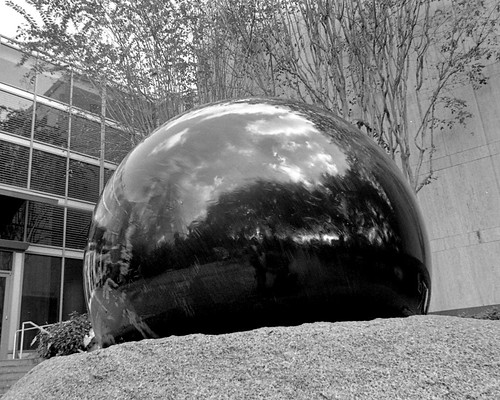
I also have another photo of this on my Flickr page. This one, however, was taken with my Pentax 645 medium format camera. The ball here is a perfectly balance sphere weighing around 6 tons. Carved into the sphere is a map of the world. The globe rests on a 1/4″ film of water that is constantly pumped in to hold it up. Because of this, a person can spin this globe in any direction with just a little push. This has always been one of my favorite works of art in the city of Houston.


This statue has become a symbol of the city. I myself have quite a few photographs (mostly digital) of this statue. This is one of my favorite film photos, though. Creating silhouettes is good for learning how light works and how to meter for the shot you want. This was taken with my Pentax 645 medium format camera.

There were a few more photos from these 2 rolls that I can use, but they won’t be shown here. Once I get my final portfolio settled, I’ll let you know. At any rate, let me know what you think of these photos.

New Toys

I made the leap from 35mm film to medium format film with the purchase of a Pentax 645 Medium Format Camera. There was a little bit of a learning curve as the controls were different from my digital and film Canon SLR cameras. This camera is a bit older so the ranges on the shutter speeds aren’t as great as on my newer Canon’s as well. Also, the shutter button is a little touchy, which makes metering a little bit tricky. I may start carrying my film SLR to help with metering until I figure out a way to stop the camera from snapping the picture every time I think about pressing the shutter release.

Let’s not forget the film. The film I have to use with it is 220 film, which takes 6cm by Xcm pictures. In my particular case, the pictures will be 6cm x 4.5cm. Even though this is a smaller medium format, it’s still much bigger than 35mm. With 220 film I get about 30 exposures on the roll, which isn’t bad. The problem with 220 film is that it is starting to become hard to find locally. I can find some at the bigger online camera stores, but in an emergency, online isn’t going to help much.

The lens I have is a 75mm f/2.8 leaf shutter. Basically it’s a manual lens. I can set the shutter speed on the lens itself. Of course, doing this would require a handheld light meter, which I can’t afford and don’t want to carry. The good thing is that I can set the shutter speed to be controlled by the camera body, which allows the oh-so-tricky metering. The aperture and focus, however, are both set on the lens, which I have absolutely no problem doing.

Now for the fun part… the pictures. The following pictures are among the first taken with the camera in my possession:


This would have made a very nice portrait of the water wall at Williams Tower. The problem, however, is the right side. The dark area is a result of the film not being developed properly, which was my fault. During processing of 35mm film, I use 10 oz of a 1:4 solution, which completely covers the roll. In this case I failed to take into account the physical size of the 35mm film versus the 220 film, which is much bigger. The 10 oz of developer solution did not cover the whole width of the roll and, well, you see the result. Even though this picture failed, we can use this dark space to our advantage as seen on the next picture:


This is the headwater into the reflecting pool at my college. The underdeveloped right side looks like a shadow. Did you know that to just to the right there is a very large building that could have possibly cast a shadow into the water? You probably didn’t, but there is a large building just to the right of the headwater of the reflecting pool. I’ll just leave out the fact that a shadow cast on this water will never happen unless the planet develops develops a deeper tilt.


Sometimes nature covers your mistakes for you. The darkness of the tree makes it hard to perceive the dark underdeveloped area to the right. If you look close, you can see the water to the right of the tree trunk is a little darker, but off-hand I don’t think one would notice it.


Every roll has to have at least one usable picture and I feel this one is it. There is nice contrast and tonality here. Also, the shadows hide the underdeveloped area really well. Some may not care for the subject matter, but at this point I’m getting used to my new toy.

At this point I haven’t scanned the whole roll. My negative carriage can only scan two medium format negatives at the same time and it got a little late.

I hope you all enjoyed the pictures. Feel free to comment at will because I need the feedback to grow.

Stress Relief

Anyone who knows me knows what kind of music I prefer. To those who don’t, that music is metal. I’ve been listening to it for a little over 20 years and it has never gotten old to me. Between the day job stress and school, I got to go see one of my favorite new bands last night (All That Remains) along with a serious up and comer (Through The Eyes Of The Dead) and a rising established act (As I Lay Dying). The best part – I got a photo pass to shoot all three bands. Here are some photos for you look at.

As I Lay Dying 5

As I Lay Dying 7

All That Remains 4

All That Remains 8

Through The Eyes Of The Dead 1

Through The Eyes Of The Dead 4

Click on the picture to see the whole thing if it is cut off. Comment at will.

It’s Been a While

Yes, it has been a while since I posted here. That isn’t to say I haven’t been snapping anything, because I definitely have been taking pictures. It’s just that I started to lose sight of the value of keeping a blog after I decided to check out Flickr.com. Flickr.com is a great site and offers a lot of cool features, but a blog is better for telling a story. I’ve also been busy as hell trying to balance the therapy business along with an anatomy and photography class. Both classes demand a great deal of time outside the classroom – anatomy due to the amount of information that needs to be processed and photography due to the work required with the camera.

In the time since my last post, I had to purchase a new scanner to scan some prints from our cruise this past summer. The scanner (Epson Perfection 4490 Photo) comes with a negative scanner. After figuring out how to use it, I found myself scanning every negative in our possession over the decade spanning my marriage up until our first digital camera purchase. So far I have scanned over 900 negatives and still have a whole lot to do. I have found some gems in there… more than likely taken by my wife, however, as before I really didn’t like handling the camera (funny how things change). The other power of this is it gives me a chance to preview my class negatives so I can decide which ones to try and print without having to print a contact sheet. I have to do a contact sheet for each roll anyway as part of the course requirements, but if I continue to shoot film, I will save time and money in paper and chemicals since I won’t have to create one.

So far, that pretty much sums things up in a nutshell. At this point I’ll go ahead and show some pictures I have taken over the past month or so. I’ve decided to leave off the information on the digital pics as it takes up more room than necessary. If you want the information, you can email me for it. As for the film pics, I don’t record the information, so I really have no idea. Some of the pictures are cut off due to layout limitations. You can view the whole picture in Flickr by clicking on the picture itself.

First, the film pics:
The Globe

Houston Icons 1

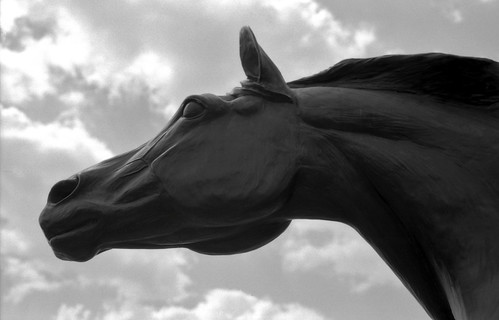
Sculpture for Peace Horse 1

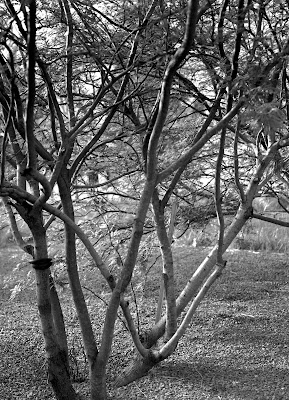
The Lonesome Leaf

And the digital pictures:
I'm Ready for My Closeup

Perennial Gardens Pagoda

The Skyway

Any comments are welcome as the feedback helps me grow. Enjoy.

South Carolina Part III

Nothing like home on a Saturday night…

I went through some more of my South Carolina pictures. As I go through them I’m finding the disappointments as well as the gems. In all of these I only had to adjust for color correctness… the exposures were good from the get go (I hope I’m getting better at this). I did find that one of my lenses is in need of a serious cleaning. Well, hopefully it’s the lens and not the sensor. I don’t want to pay to have the sensor cleaned and I don’t have the confidence or tools to do it myself. What to do, what to do… anyway, enjoy!


Aperture: f/2.8
Shutter Speed: 1/25
ISO100 with 0ev
Focal Length: 17mm

This is an alley just off main street in Greenville, SC. The US Bicycle festival was happening on a blocked off section of Main Street at the Greenville Hyatt Regency. I took this one just cuz I was bored walking toward the street. I liked this one because of the contrasting colors as well as the detail.


Aperture: f/32
Shutter Speed: 1/6
ISO100 with 0ev
Focal Length: 35mm

This was taken from an observation point at Caesar’s Head State Park in South Carolina. We were pretty high up in the hills at this point and at the top of this particular hill. The view was definitely breathtaking. The downside to this was that it was cloudy that day. This is one of the few pictures from that observation point that came out good because the sun was able to peek through the cloud for a short time. I know the trees in the lower right distract from whole picture, I left them in because it gives a good perspective as to how high up I was when taking this picture.


Aperture: f/4
Shutter Speed: 1/1000
ISO100 with 0ev
Focal Length: 50mm

Taken at Cowpens Battlefield National Park in South Carolina. I took this one just for the sake of taking a picture. Even though there isn’t much going on here, the detail captured in the trees helps bring out the natural contrasts. That makes a great contrast against the relative evenness of the sky (at least I think so).


Aperture: f/2.8
Shutter Speed: 1/2000
ISO100 with 0ev
Focal Length: 17mm

Taken at Cowpens Battlefield National Park in South Carolina. This is another shot of the monument in front of the Visitor’s Center. In the photo are my wife and her sister. What makes it for me is that this shows 2 non-Americans appreciating an important piece of the history of our nation. They both showed great interest in it, and that seems to be lacking in a lot of Americans who have had families here for more than 2 generations.

Cruisin’

I’m still going through all of my South Carolina pictures. It’s taking a while due to the fact that not only am I taking a photography course, but also I have a day job and an taking an anatomy course (which itself takes a lot of time outside the classroom). So today I decided to post some pictures from my cruise last July. Some of these were taken with my DSLR, others taken with my point and shoot. I will label each picture with the camera used along with the other information. Most of these were fixed in Aperture, mostly for exposure and color issues (I do get lucky every once in a while with a shot). I deleted the project, so I don’t know the details of what I did to fix them. That’s not a bad thing, though, now you can just enjoy them.


Camera: Canon EOS Rebel XTi
Aperture: f/10
Shutter Speed: 1/500
ISO100 with -1.0ev
Focal Length: 59mm


Camera: Canon EOS Rebel XTi
Aperture: f/25
Shutter Speed: 1/50
ISO100 with -1.0ev
Focal Length: 24mm


Camera: Olympus Stylus 770SW
Aperture: f/3.5
Shutter Speed: 1/125
ISO80 with 0ev
Focal Length: 7mm

The top picture is Montego Bay, Jamaica. The 2nd picture is the Jamaican countryside as seen from the deck of the Carnival Conquest. The third picture was taken on our shore excursion (helmet diving) by the guide using my Olympus. One of the great things about that Olympus is the fact that it is waterproof to 33 feet as well as weather proof, which is a great thing for shooting cloud formations.


Camera: Canon EOS Rebel XTi
Aperture: f/10
Shutter Speed: 1/160
ISO100 with -1.0ev
Focal Length: 21mm


Camera: Olypmus Stylus 770SW
Aperture: f/4
Shutter Speed: 1/640
ISO80 with 0ev
Focal Length: 7mm

Taken at Grand Cayman Island. The top picture is where we entered the country. We had to anchor offshore and take a tender into the country as the water is too shallow for the cruise ships. That picture does it for me as it shows thunderstorm remnants in the distance (the anvil top from the cumulonimbus hasn’t fully dissipated; neither has the altocumulus). The storm was well off the island. The second picture shows a stingray swimming by. We were on a sandbar (ocean water waist deep!!) feeding the stingrays.


Camera: Canon EOS Rebel XTi
Aperture: f/13
Shutter Speed: 1/60
ISO100 with 0ev
Focal Length: 72mm


Camera: Olympus Stylus 770SW
Aperture: f/6.3
Shutter Speed: 1/640
ISO80 with 0ev
Focal Length: 7mm

The top picture shows the port of Cozumel, Mexico. What struck me about this port was how colorful the buildings are in appearance. It’s definitely a nice departure from Galveston, TX, where the cruise ship moves past all the cargo terminals. Oh, and the blue water doesn’t hurt either. The second picture is my idea of Heaven on Earth – Isla Pasion. This is where the Corona commercials are shot. I didn’t want to leave.


Aperture: f/5
Shutter Speed: 1/60
ISO400 with -2.oev
Focal Length: 18mm


Aperture: f/5.6
Shutter Speed: 1/60
ISO800 with -2.oev
Focal Length: 18mm

Both of these were taken with the Canon DSLR. The top picture is the ceiling just below the vertical portion of the cathedral ceiling in front of the elevator bank in the ship’s main lobby. The ship’s architect said in an interview that his inspiration for the Carnival Conquest was the art and artists of the Impressionist Era. You can definitely see that here with the reproductions of various paintings all in a collage. The collage spreads all the way up the vertical portions up to the 8th deck where it becomes balcony. The second picture is a shot of the main lobby itself. The top floor (deck 5) held retail shops, casinos, lounges, and clubs… the middle floor (deck 4) held the photo area (photos taken by Carnival for sale) along with the main dining rooms, and the lowest floor (deck 3) held the lounge in the main lobby as well as some other lounges off to the side.

I hope you enjoyed these. I have almost 400 pictures from the cruise between the 2 cameras, but these are among my favorites. I invite and comment and criticisms.

« Older posts Newer posts »