Category: Education (Page 4 of 4)

The Final Project

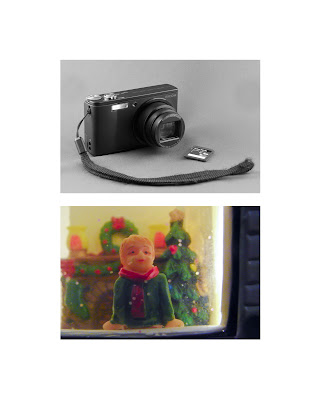
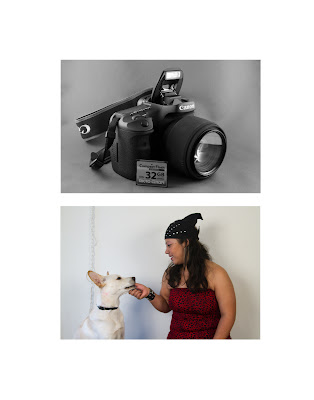
The final project was turned in yesterday. I received some generally positive feedback on the pictures I presented from both the rest of the class and the instructor. Of course, the instructor’s opinion matters the most and she will apply the final grade based on a more in-depth analysis of the project.

Without further ado, here is my statement and photos for this semester:

It’s easy to want the latest and greatest in everything. We all want the newest car, the bigger house, the ultimate computer, to name a few things. For some who are into photography, this includes the latest and greatest in camera equipment. With all of the sophisticated selling points that accompany the new products, being sucked into wanting the latest and greatest can sometimes be hard to avoid. I myself have been stricken with technolust on a few occasions, but the reality of the checking account balance proves to be an effective cure for that malady.

It’s easy to forget that the camera is merely a tool. A photograph begins and ends in the mind. The camera itself is only the first tool used to provide a genesis to the photograph. It matters not whether the camera is a homemade black box with a pinhole aperture or the latest Hasselblad 48 megapixel medium format digital – without the inspiration, the image never gets created.

That’s not to say that the camera is not important. Every camera has its capabilities and faults that the photographer can exploit to his or her advantage. Each camera in my personal collection has a purpose based on their capabilities. The Olympus, for example, is a waterproof camera that allows me to do things I can’t do with my Canon 7D. The Pentax 645 uses medium format film, which gives me the ability to take shots that can be enlarged to a much greater degree than can 35mm. They all have something to offer.

Each pair in this series is a testament to the abilities of each camera and the fact that it doesn’t take a Canon 1D Mark III to create a beautiful photograph. The black and white camera photographs attest to the fact that I feel no camera in my collection is more important than the next, and when taking shots each camera is considered based on what is in my mind.


Work Has Begun

My final exam project is due on Monday, 6 December 2010. The guidelines are as follows:

6 rolls of film shot (24 or 36 exposure or 120 film) or an equivalent number of digital
6 high quality prints which can be presented in any creative manner

The themes can be chosen from the following:
1. Joiners
2. Documentation of a story, either real or made up
3. Photographic illustration of a poem or song

It’s a pretty loose set of requirements, but the themes do require some thought. I had originally decided to go with option 3, but the person I asked to assist recently joined the ranks of the employed and thus is unable to help at this time. It’s ok, I’m just glad she was able to find a job. At this point I’m going with option 2 and going to tell a little bit of my own story.

Work began earlier this evening. So far I have 43 digital shots split between 2 subjects. The story can go 1 of 2 ways, and at this point I will let the photographs develop the story for me. Wish me luck as I begin this journey. Since the Texans are playing on Thursday this week I should have pretty much all day on Sunday to figure out how I’m going to present my final shots.

In Class

So I am retaking Photography II at my local community college. At this point we are about 3 weeks from the end of the semester. Along with my Anatomy and Physiology class I have been pretty busy.

So far I’ve done 4 projects and am currently working on a side project and my final project. I’m still trying to make arrangements for my final project so I will decline to share that at this point. The side project on which I am currently working is a print using the gum bichromate process. It has proven to be very time consuming but definitely very enjoyable. In fact, I’m in the photo lab as I write this entry awaiting the drying of the emulsion on the paper for my next layer. I will be sharing the results with you all as soon as I can get a print that I feel is complete.

My previous forays into photography classes were not as structured as this one. In Photography I we learned the basics of exposure, film development, and printing of the negatives. The only assignments given were an oral presentation on a well-known artist, the midterm print, and the final portfolio. There were no structured shooting assignments. Basically, we could shoot what we wanted and the only stipulation was that we had something for critique days. The condition set for the final was that all the photos had to be tied together somehow and there were to be a minimum number of matted prints. Photography II was pretty much the same structure, but there was no midterm and the only technicals discussed were those dealing with color theory as it relates to printing on color photo paper.

In this class, however, I was given 4 loosely structured shooting projects. The first project was purely technical in nature as it was an introduction into the zone system of exposure and experimenting with an 18% gray card. The second project was one where I documented, through photography, a dream that I remembered having. That project was very fun as it allowed me to move into experimental subject matter. The third project given required me to consider the use of time in shooting the picture. There were many possibilities with this one as well, and I had fun going through the different ways to factor time into the photographs. The fourth project was a self-portrait (which those of you who see me on Facebook have already seen). I don’t really care to take pictures of myself so I wasn’t thrilled with that one.

Instead of resin coated paper, this semester the professor had me using fiber paper. This has turned out some wonderful prints as the contrasts and shadows have a richness (due to higher silver content) that I could never reproduce on RC paper. It definitely took me a while to get used to printing on this as the exposure times were shorter. This semester I was also learned how to create my own negatives from digital photography for printing on photographic paper. This little skill has proven to be most helpful as I have created a couple of beautiful prints on fiber paper from digital files. Of course I could pay to have my digital photos printed via a digital chromogenic process, but nothing matches creating something by yourself.

So that’s been my semester in a nutshell. Hopefully I only need one or two more passes on the gum bichromate print in order to have something really special. My final is going to be an ambitious project, but unless my model and I can synch our schedules, I may have to go with a Plan B. At this point I’m going to start force-drying the emulsion on my gum print. Wish me luck as I move forward with this side project. I will check in again with you all soon.

The Results are in…

For those who read this (all 3 of you hehe) that may have been wondering what grade I received in my Photography II course, wonder no more… I received a B. The teacher didn’t go over anything when he looked at our portfolios… he simply went through them, snapped photos of a couple of pieces, closed it up, and went on to the next person. I’m not sure what the basis was for the final grade. I know that I did miss one critique, so there may be an issue of productivity. At any rate, perhaps I’ll ask him sometime down the line.

There aren’t any pictures tonight. We had a get together at my house earlier today and I’m kinda tired from the cleanup. Have a good night everyone.

The Portfolio (Warning – Long Post)

This semester has been stressful to say the least. There have been a lot of demands on my time these past few months. This doesn’t even count all the things going on beyond my control, such as rising prices, getting sick, and presidential elections, that affect me. In a few days it will all be over and I will be able to relax (relatively speaking) for a few months before the next semester starts.

I may take Photography II again as it will help me grow as a photographer. I know the professor will help me go in new directions. However, I won’t really be learning anything new by taking the course again. I wouldn’t mind taking a more advanced photography course at the University of Houston, but that costs a lot more money than the local community college. Hmmm… I’m sure there are other options.

But before I start daydreaming again, I have settled on my final portfolio. I made some changes from my last post by taking a couple of pictures out and adding in a few others. I tried to make the flow a little more logical through the pictures before taking a radical turn at the end. You can see for yourself when you view the photos. Speaking of the photos, without further adieu, here they are:

#1

#2

#3

#4

#5

#6

#7

#8

#9

#10

#11

#12

#13

#14

#15

Ok, 15 pictures are ready for the portfolio. There is no overlying theme to them, but there is definitely a flow to them. For the uninitiated, here goes:

1. Sunset at Padre Island, a suburb of Corpus Christi, TX;
2. A man walking along the seawall just off Shoreline Drive in Corpus Christi, TX;
3. Downtown Corpus Christi from the piers;
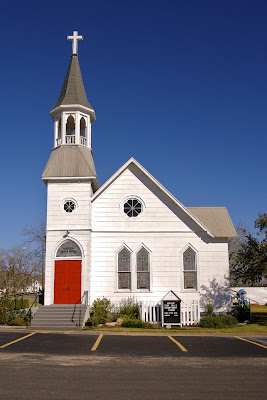
4. The courtyard at St. Mary’s Catholic Church in Brenham, TX;
5. Mill Creek Church in Bellville, TX;
6. The dome at Sacred Heart Catholic Church in Galveston, TX;
7. St. Paul’s Lutheran Church in Schulenburg, TX;
8. The Chapel at the Houston National Cemetery in Houston, TX;
9. The northwest corner of Downtown Houston, TX taken from the bank of Buffalo Bayou;
10. The traffic circle coming from the 1500 Louisiana building (formerly Enron II) in Downtown Houston, TX;
11. The cello player sculpture in front of the Lyric Center in Downtown Houston;
12. Waylon of the band Mushroomhead during their performance in Houston, TX on April 12, 2008;
13. Nothing of the band Mushroomhead during their performance in Houston, TX on April 12, 2008;
14. Nate Johnson of the band Since The Flood during their performance in Houston, TX on April 3, 2008;
15. Rick of the band Since The Flood during their performance in Houston, TX on April 3, 2008.

As you can see, there is a flow to the way the photographs are arranged. It took a bit of thinking to get that together. Numbers 2 and 3 were film shots taken with my Pentax 645 on Kodak Portra 160NC color film. All the rest were taken with my DSLR. All of the photos except 10, 12, and 15 are printed on archival inkjet paper using an Epson 2200 printer. Numbers 10, 12, and 15 are printed on photo paper using the chromira process.

Barring any last minute order tweaking (we are always second guessing ourselves), this is the final portfolio this semester. Let me know what you think as I need the feedback to grow.

That Time Again

We’re coming up on the end of another semester. That means it’s portfolio time. This time I don’t need an unifying theme, but I do need 15 to 20 of my best prints. I’m going through them at this point and have decided on some to go in, but I’m going to need a few more. The cool thing is this semester we had a digital project, and I have plenty of digital photos to choose from this semester.

The cool thing is I’m seeing growth in my photography. The not so cool thing is that I’m having trouble charting my growth… i.e. I’m having trouble seeing what it is about my pictures that shows growth. Hopefully soon I can figure this out.

Here is a sampling of what I’m submitting for the final. First are the digital shots:

The first photo was printed with a chromira process. This process takes the digital image and exposes it to normal photo paper. The print is then processed normally as you would a film print. The others were printed on either Moab Somerset Enhanced Velvet paper or Moab Lasal Premium Luster paper on an Epson 2200 photo printer.

And now for the film prints:

These were both taken on Fuji 160C with a Pentax 645. I was able to complete the first print successfully in the enlarger. The second print, however, had a few dust problems when I put it through. It looked as if there was some dust in the emulsion. I’m thinking with this one I may go ahead and print it on the Epson. I have a feeling that it will really pop out if I print it on the Moab Somerset Enhanced Velvet paper, which gives the photograph the feel of a watercolor painting.

As you can see I have 7 selections so far, so I’m just under halfway there. Then I need to decide on the portfolio format, mat the prints, assemble the portfolio, drink lots of caffeine, etc. Oh yeah, I have 2 other finals I need to study for as well.

Comments are welcome and encouraged.

Busy Busy Busy

I started classes 2 weeks ago. Between the day job, the hobby, trying to exercise, and keeping up with classword my life has been like a whirlwind the past couple of weeks. It’s only going to get even more hectic over the next couple of months as I try to tackle a couple of things that need attention.

However, since this is a photo blog and not a whiny emotional type blog, let’s get to the photography. I started my Photography II course earlier this month. The prophecies given by my Photography I teacher came to pass – we’re working in color for this course. This is not a bad thing as I want a better understanding of color where photography is concerned. I won’t say at this point whether I like color or black and white better since they both have their pros and cons.

We’re not going to be processing the film or developing prints in chemistry. The teacher has directed us to have our film processed by a third party and we will be using a color processor to achieve the prints. Our only interaction will be to expose the paper on the enlarger. I am a little sad that we won’t be working with chemistry ourselves as this helps to instill that photography is a process and not a singular event. I know I’ll be saving money by not having to purchase chemistry, but I have a feeling that paying a third party to process my film may get a little expensive.
The problem I’m have so far, however, is that I have 5 rolls of film shot (in 2 weeks time) and processed, but I have not yet had a chance to produce any prints! The teacher was there for the first 2 classes but has not been there for 2 of the last 3 meetings (the other meeting, which was the middle of the 2 that the teacher wasn’t present, I wasn’t able to attend due to a lingering migraine). I know he was sick and I hope everything is well with him… I’m just anxious to get started especially since I paid a lot of money to attend this course.
In the meantime, however, I’ve been keeping my Flickr page updated. I haven’t been trying to ignore this blog. It takes a lot of time to develop the words I write here and I want to make sure that everything is at the very least coherent. I apologize for those who may have been waiting for me to update these pages.
Anyway, on to the pictures…

My mother came down to Houston for 2 weeks to watch my cousins as my uncle (her brother) and his wife took a 20th anniversary vacation to Greece (which, incidently, is where they met and married… ironically neither one is Greek). My wife, my mom, her best friend in New York, and I all went down to Corpus Christi, TX over one weekend to visit my grandmother. Since I’m enrolled in a Photo II course, I took my trusty Pentax 645 along with my Canon DSLR. I shot three rolls of Kodak Portra 160 (1 roll of VC and 2 rolls of NC) and about 7 digital shots. After having the film processed, I’ve settled on the shots I like the best.

These 2 shots were taken with the Pentax 645. We were on a T-head along the coast looking at the replica of the Nina. Both of these were pointed out to me… my grandmother pointed to the pelican and my wife pointed to the buildings. The pelican was sitting on that post just past the end of a slip. I walked to the end of the slip to get him… he cast a disinterested look toward me, but that was it… he really didn’t care that I was there. As for the shot of downtown Corpus Christi – I had already gotten some similar shots from other vantage points on the T-head, but in one particular spot my wife had pointed me in that direction again and somehow I knew that where I was standing would be the best shot of these buildings.


In terms of composition this particular picture is my favorite. The city of Corpus Christi, with its shining beacons, is in the background. In the foreground is a desolate area of rock and dirt. The wide water barrier separates the city from the desolate area. The lone man with his fishing pole seems distraught. Has the water yielded no bounty today? Does he dread his task ahead? Perhaps he longs to be in the city, but cannot get there. Has the city cast him out? Is he an outsider to afraid to go in?

This was actually taken before we had gotten to the T-heads. Shoreline Drive follows the Corpus Christi coast right into the downtown area. Along this road are a number of small municipal parks were families can enjoy the weather. This was taken from one of those parks.


While the lonely fisherman may be my favorite, this one has quickly become a favorite on Flickr. I must admit I am rather proud of how this one turned out as in the original scan the picture was very washed out. The scale that is shown here really gives a sense of the size of an aircrafter carrier – even our old World War II-era vessels. I am anxious to get this one in the lab to see if I can get it to come out the same on paper as I got it using Aperture.


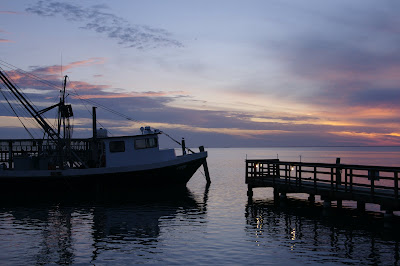
These final 2 pictures were taken with my DSLR at sunset on Padre Island, just off the coast of Texas. We were getting ready to eat dinner at a place called Snoopy’s. The patio area of Snoopy’s happens to be a pier. I went out their while waiting for my fish and chips to see if I could capture the sunset. Believe it or not, I was able to get these without needing my tripod. I was proud of both of these as this was one of the first times I was able to get an accurate color representation at the time of the shot and was able to keep the post processing to a minimum.

As always, comments are welcome and encourage so I can continue to grow.

Final Exam Update

I turned in my final today, but with one picture being discarded in favor of another. The photo of the General Sam Houston statue silhouette had to be discarded. The reason for this was the print that was made showed a problem with the negative. When making a print, I was getting what looked like black dust to the left of the statue. This didn’t show up in the scan (more than likely due to the software that helps remove dust from the pictures). When I examined the negative on the light table I found some specks on the left side and the top of the negative. I asked my teacher about it and, after looking closely at the emulsion side of the negative, determined that a substance was on the negative and was causing the bad prints. I tried to clean the negative, but it was a no go. This really sucks because I loved the picture.

The picture I decided to go with is the medium format globe picture below. It still fits the theme and I am confident the teacher will see the same thing.

As always, comments are welcome.

Crunch Time

First of all, I just want to say that I hope everyone who celebrates Thanksgiving had a good holiday. For those of you who don’t celebrate Thanksgiving, I still hope you had a good day :).

At this point we are getting down to crunch time on the semester. I’ve been going through my scans and I’ve decided on the 12 photos that I’m going to submit for the final exam. The requirements for the final are as follows:

12 high-quality prints, spot toned where necessary,
contact sheets for the rolls of film from which the print was made,
each print is to be matted on 11×14 mat board,
a self-critique, and,
all prints should have an overall theme.

The theme I decided to go with is the design and architecture of structures in Houston. It could be a park bench, a pool, or a skyscraper. The unifying theme here is that the main elements in the photo are designed and built by men and women to help make the city beautiful. Without further ado, here are the photos I will be submitting for the final. The photos are in order from oldest to newest… I think I can see a progression here :).


Houston Icons 1 – From left: JPMorgan Chase Tower, Penzoil Plaza, and Bank of America Tower


The water wall at Williams Tower – this thing pumps 11,000 gallons of water per hour. It is truly a sight to behold close up.


Williams Tower – At 901 feet this is the third tallest building in Houston (22nd in US) but probably one of the first recognizable skyscrapers in the city.


A Houston Metro bus stop in the Uptown/Galleria area of Houston. This interesting design is only found on the bus stops in this area of town.


Houston Icons 2 – From left: Continental Airlines corporate headquarters, the old Enron corporate headquarters, and a building that I am currently unable to identify.


The Ring – This skyway is a complete circle around the intersection of Smith St. and Bell St. in downtown Houston. The attached building here is the old Enron building.


General Sam Houston sculpture in Miller Park, just south of downtown Houston.


A shot looking north from the side of the reflecting pool in Miller Park.


Halliburton Center(?) just outside Minute Maid Park. Halliburton Center is part of the Minute Maid Park grounds and is located on the Crawford St. side of the stadium. These are the unusual benches that are in this little park.


I forget the name of this Roman Catholic Church, but it is one of the few left in Houston that hasn’t been torn down in favor of a more modern design. This church is located just across Texas Ave from Minute Maid Park.


Another angle of the old Roman Catholic Church. This church was built in 1839.


Bank of America Tower as seen from the veranda of Jones Hall.

Here is my final exam. Let me know what you think as your comments help me grow.

Newer posts »